Introduction
This repair guide was authored by the iFixit staff and hasn’t been endorsed by Google. Learn more about our repair guides here.
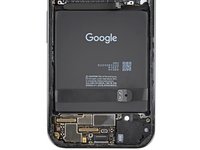
Follow this guide to remove or replace the battery in your Google Pixel 9 Pro.
Lithium-ion batteries have a limited lifespan. If your phone doesn't hold a charge or dies unexpectedly, it might be time to replace the battery.
If your battery is swollen, take appropriate precautions.
This procedure requires clamping your phone to your workspace. If you don't have clamps, you'll need a second person to secure the phone.
You'll need replacement rear cover adhesive to complete this repair.
Note: Any repair can compromise the water resistance of your phone. Retaining water resistance after the repair will depend on how well you reapply the rear cover adhesive.
What you need
-
-
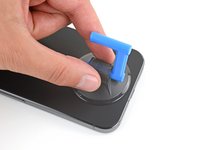
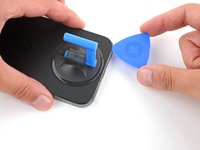
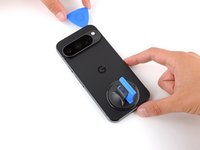
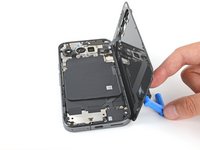
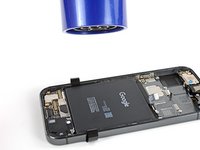
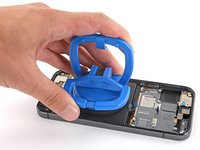
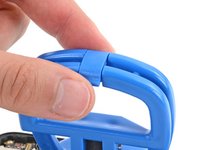
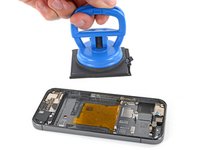
Attach a suction handle to the bottom edge of the rear cover, as close to the edge as possible.
-
-
-
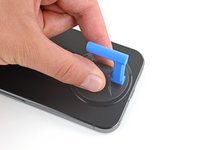
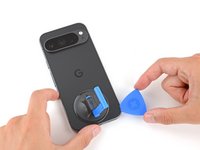
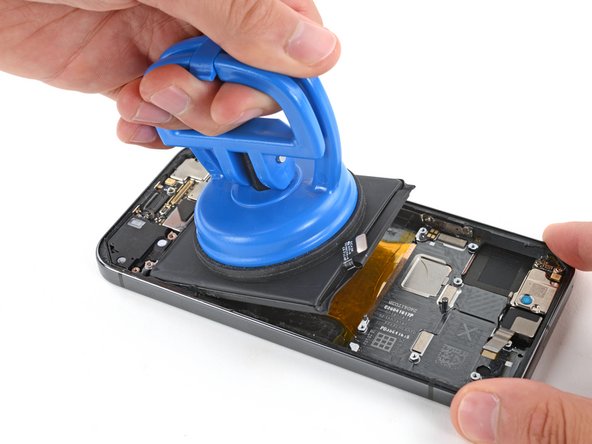
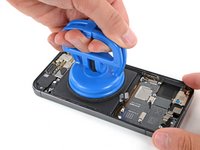
Pull up on the suction handle with strong, steady force to create a small gap under the rear cover.
-
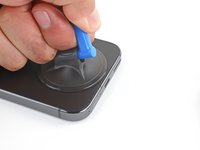
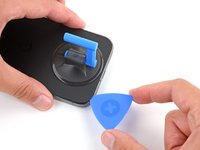
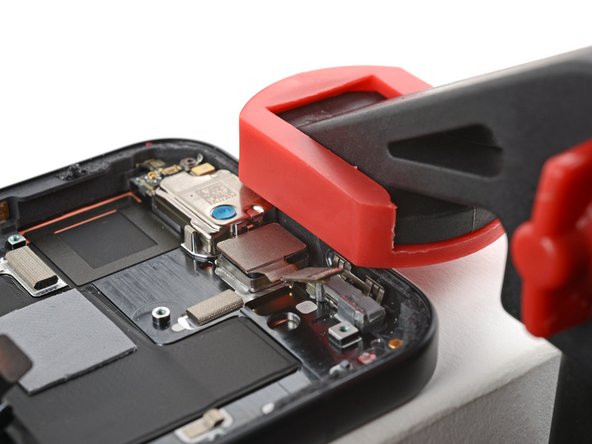
Insert the tip of an opening pick in the gap.
-
-
-
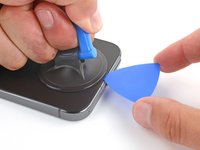
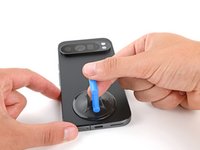
Slide your opening pick along the bottom edge to separate the adhesive securing it.
-
-
-
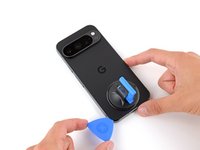
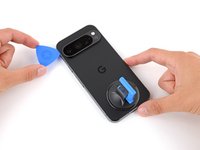
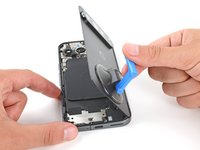
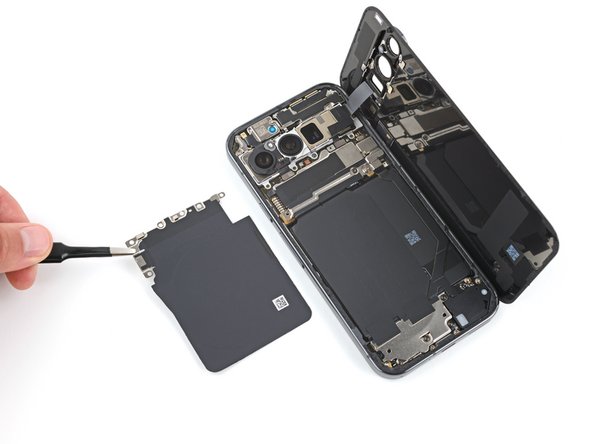
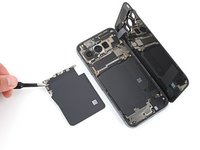
Use the suction handle to lift the left edge of the rear cover and swing it over the right edge, like opening the cover of a book.
-
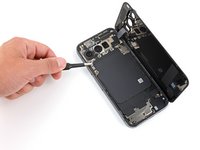
Prop up the rear cover with the suction handle so you can access the ribbon cable near the top right corner.
-
-
Tool used on this step:FixMat$36.95
-
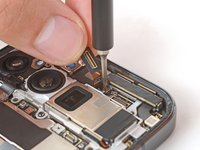
Use a Torx Plus 3IP screwdriver to remove the five screws securing the wireless charging assembly:
-
Four 5.4 mm‑long screws
-
One 1.5 mm‑long screw
-
-
-
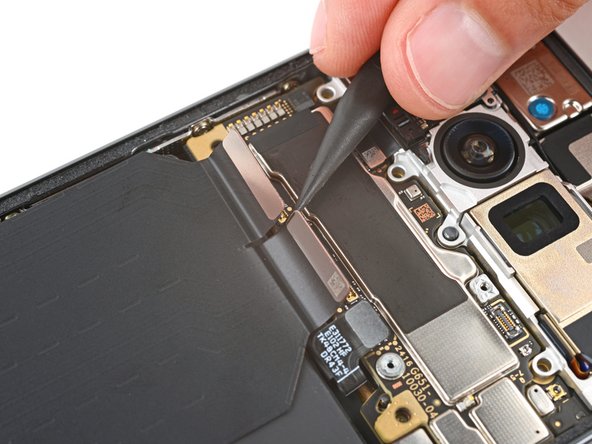
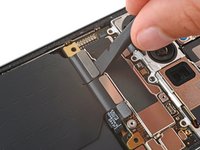
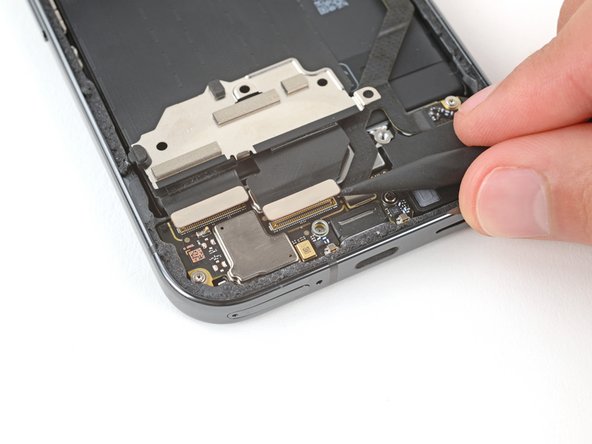
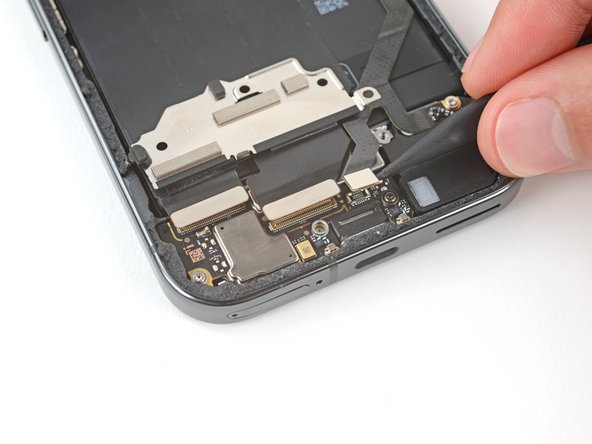
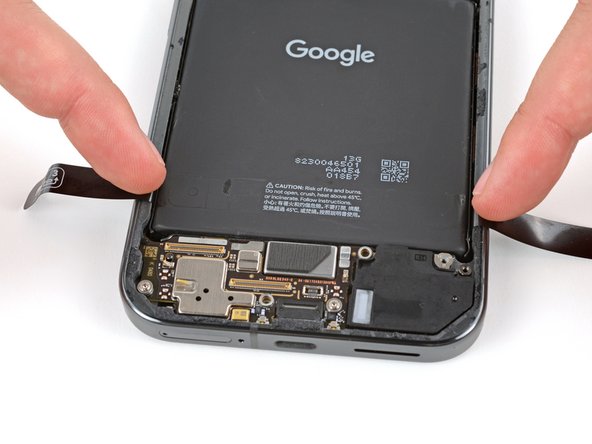
Insert the tip of an opening pick under the left edge of the rear cover press connector and pry straight up to disconnect it.
-
-
-
Use a Torx Plus 3IP screwdriver to remove the two screws securing the cable cover:
-
One 2.3 mm‑long screw
-
One 5.4 mm‑long screw
-
-
-
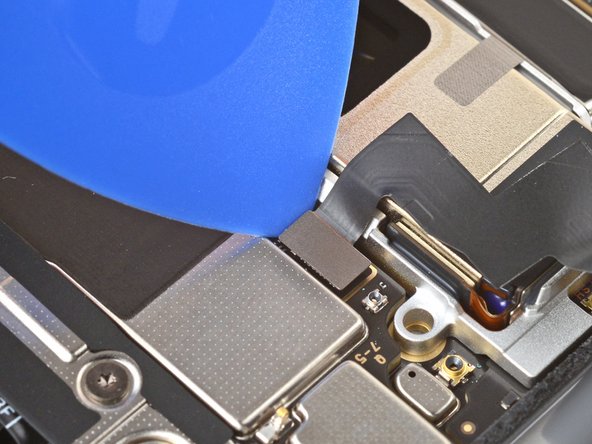
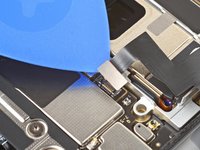
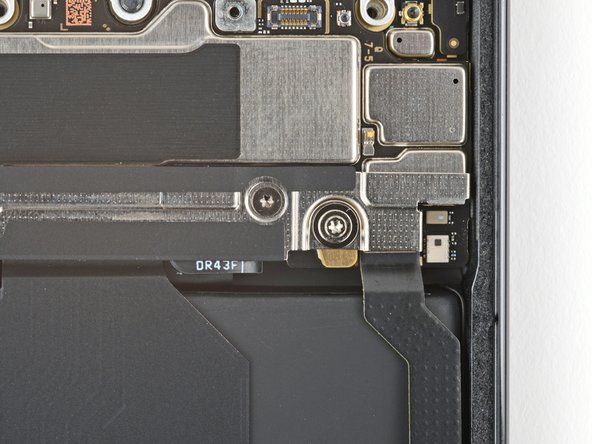
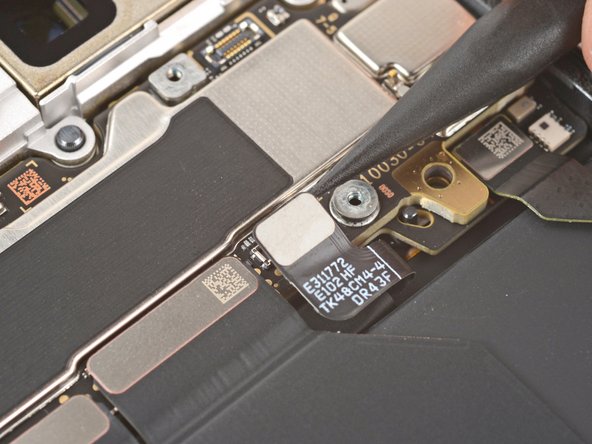
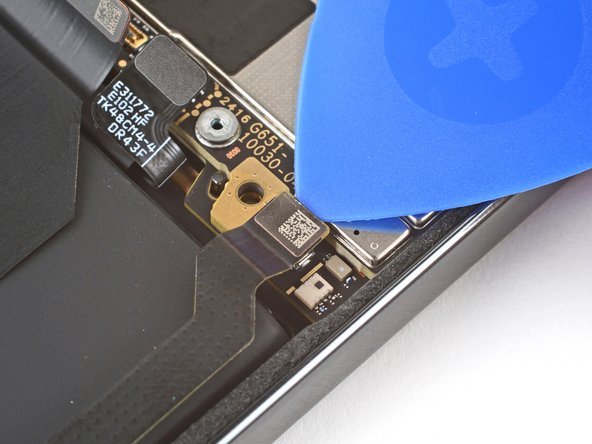
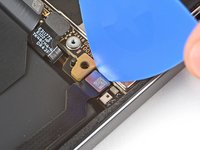
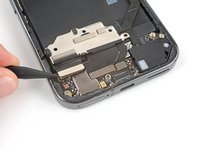
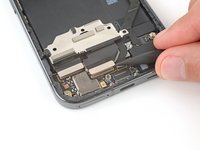
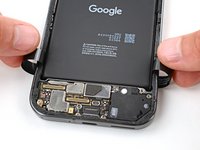
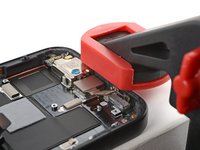
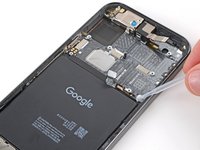
Insert the point of a spudger under the right edge of the battery press connector and pry straight up to disconnect it.
-
-
-
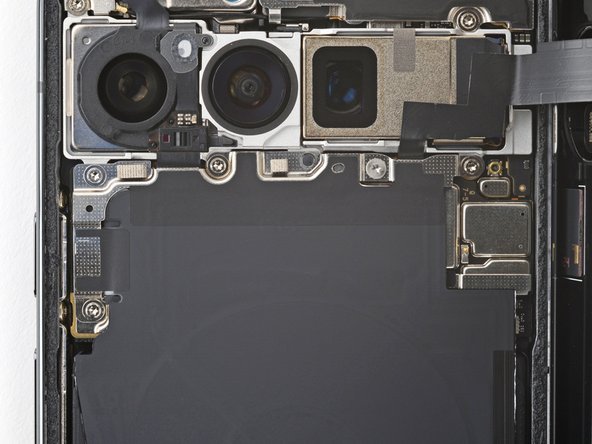
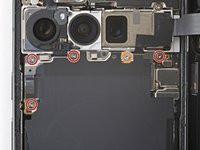
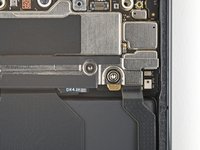
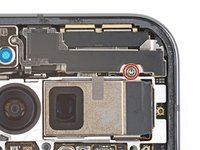
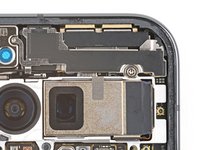
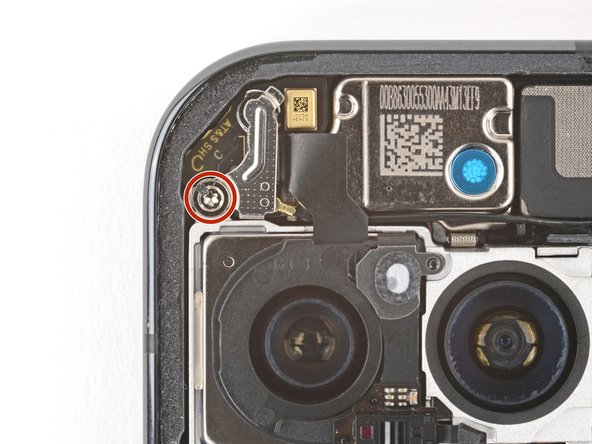
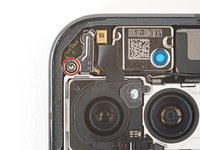
Use a Torx Plus 3IP screwdriver to remove the 5.4 mm‑long screw securing the mmWave antenna cover.
-
-
-
-
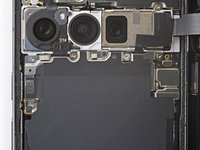
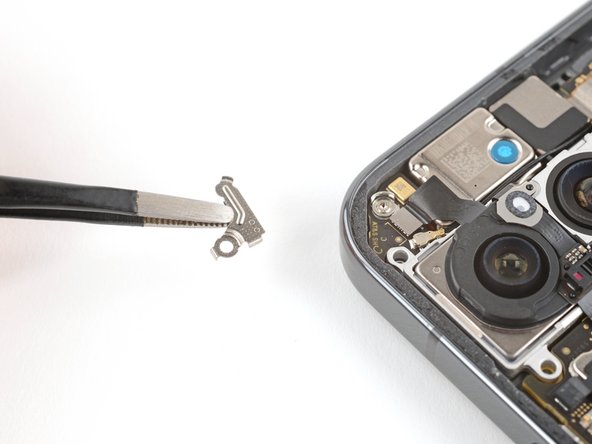
Insert the point of a spudger under the clip near the bottom left corner of the mmWave antenna cover and pry up to unclip it.
-
-
-
Gently pull the right edge of the cover towards the bottom of the phone and remove the cover.
-
-
-
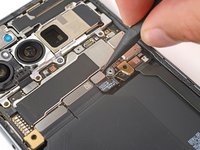
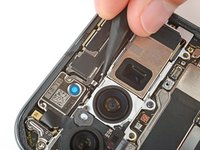
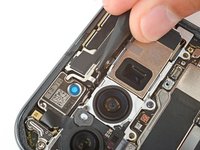
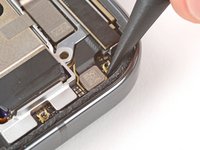
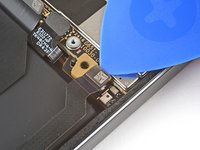
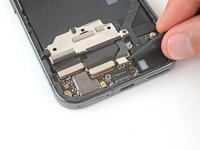
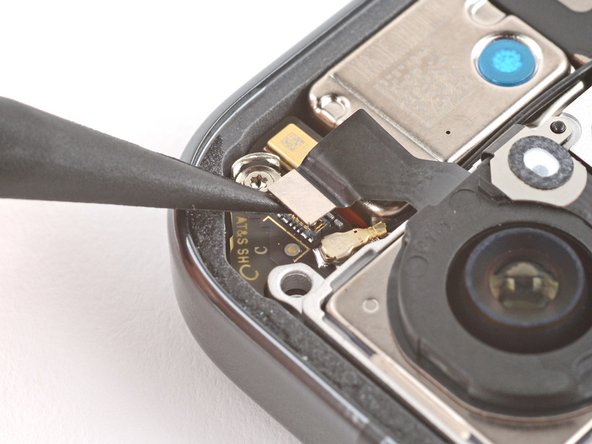
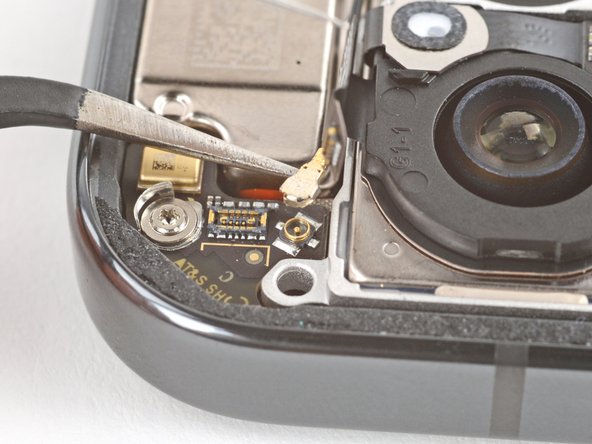
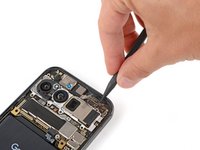
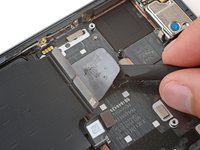
Use the point of a spudger to pry up and disconnect the mmWave antenna press connector from the top right corner of the logic board.
-
-
-
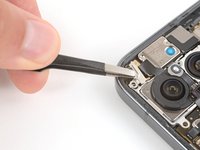
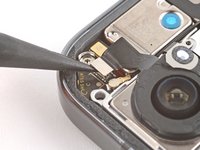
Use the point of a spudger to pry up and disconnect the front facing camera press connector.
-
-
-
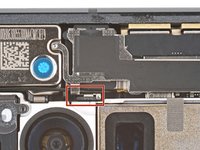
Carefully hold the front facing camera cable out of the way so you can access the mmWave antenna screw.
-
Use a Torx Plus 3IP screwdriver to remove the 4.3 mm‑long screw securing the mmWave antenna.
-
-
-
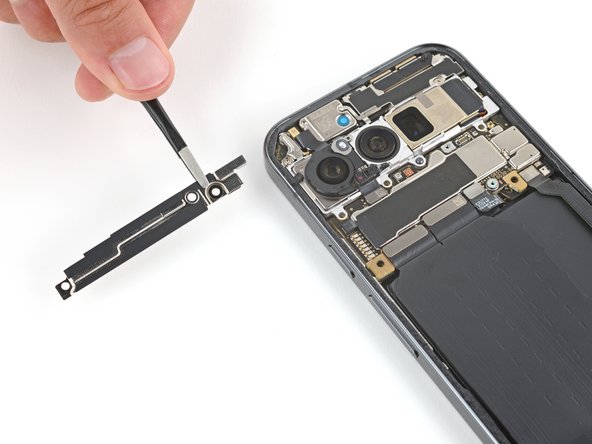
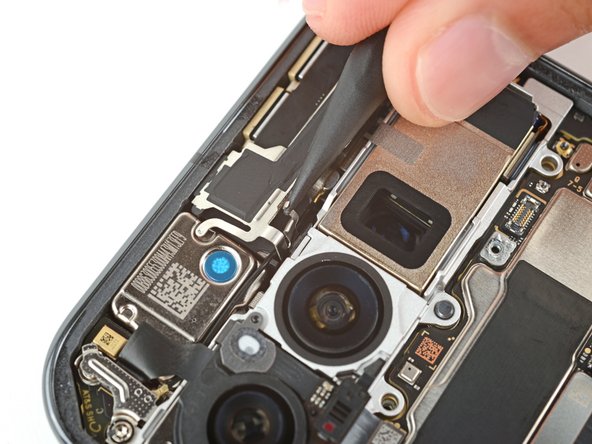
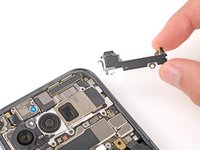
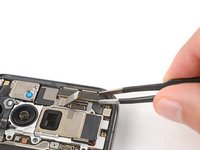
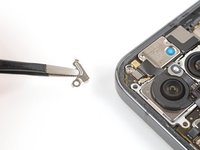
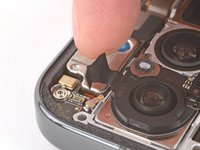
Use tweezers or your fingers to remove the mmWave antenna.
-
-
-
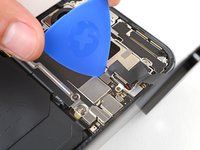
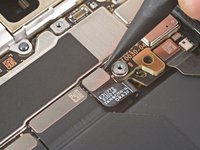
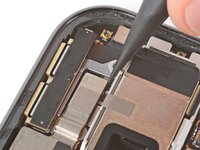
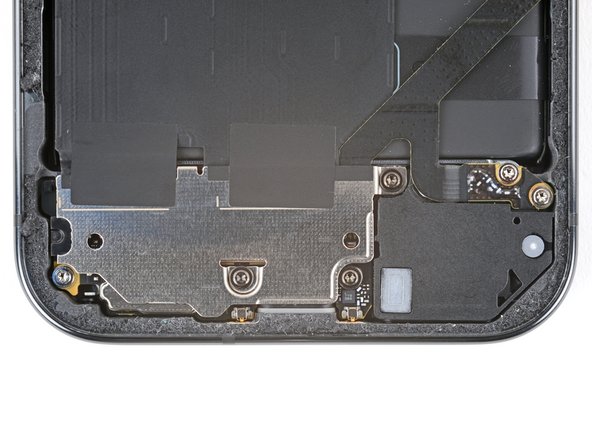
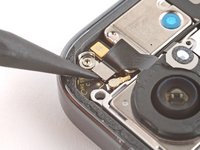
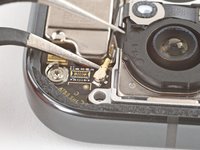
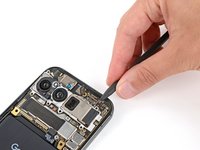
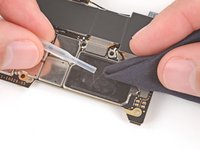
Use the flat end of a spudger to pry up and disconnect the press connector near the bottom left corner of the logic board.
-
Use the point of a spudger to disconnect the press connector just to the right of the previous one.
-
-
-
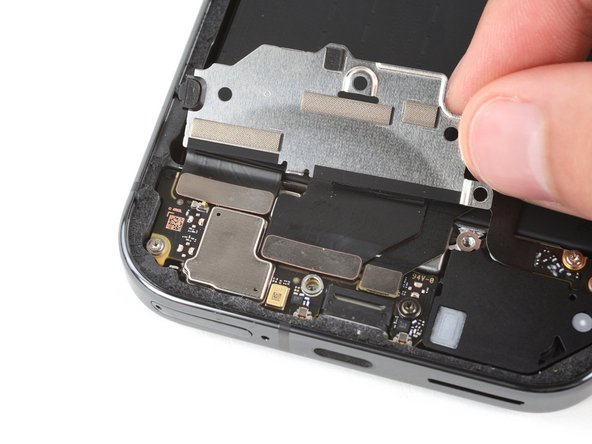
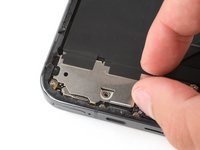
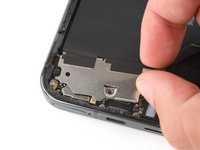
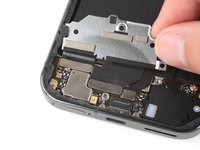
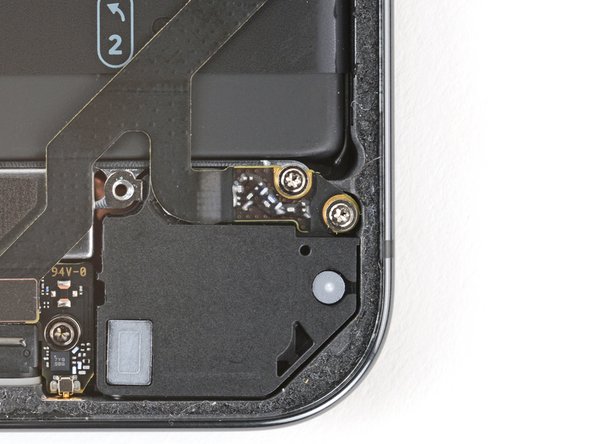
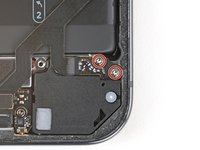
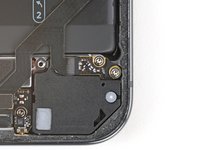
Use a Torx Plus 3IP screwdriver to remove the two 4.3 mm‑long screws securing the charging board cover.
-
-
-
Use the point of a spudger to pry up and disconnect the three press connectors on the top edge of the charging board.
-
-
-
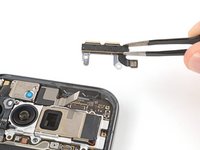
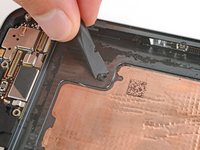
Use your fingers to remove the left interconnect cable.
-
-
-
Use a Torx Plus 3IP screwdriver to remove the two 2.5 mm‑long screws securing the bottom of the right interconnect cable.
-
-
-
Use a Torx Plus 3IP screwdriver to remove the 5.4 mm‑long screw securing the antenna cover in the top left corner.
-
-
-
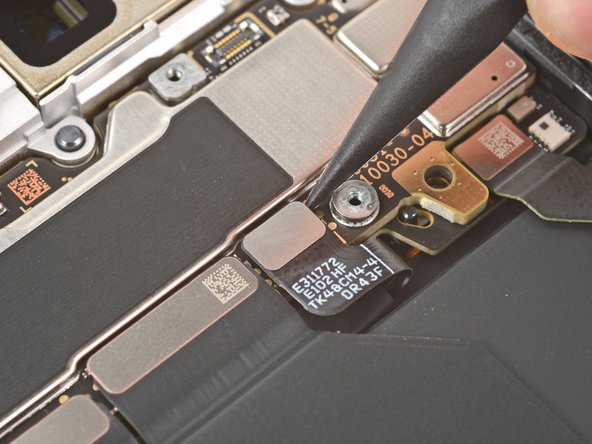
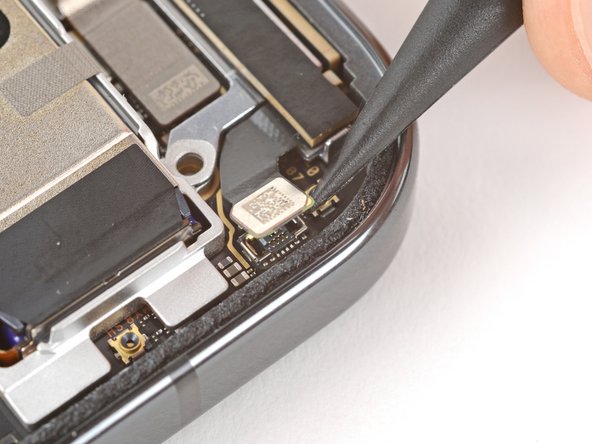
Use the point of a spudger to pry up and disconnect the autofocus sensor press connector from the top left corner.
-
Carefully move the cable out of the way so you can access the metal antenna connector underneath.
-
-
-
Slide one arm of your angled tweezers under the metal neck of the antenna connector and lift straight up to disconnect it.
-
-
-
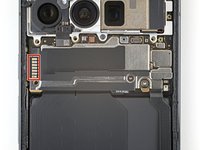
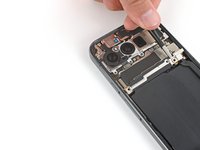
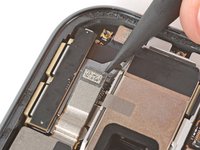
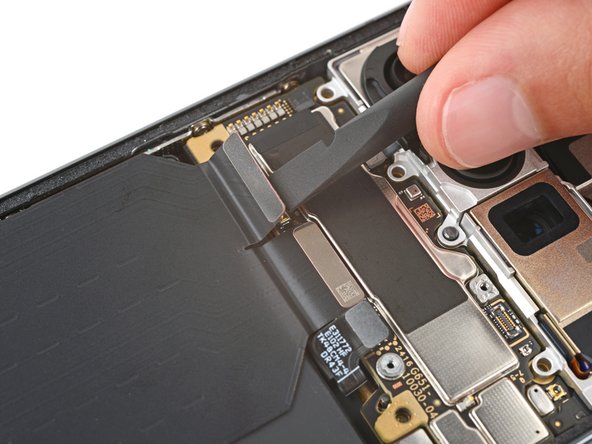
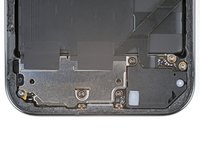
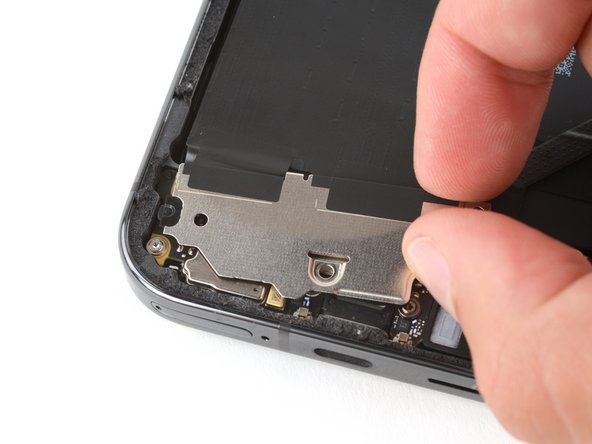
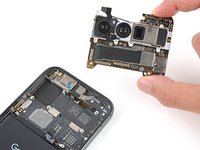
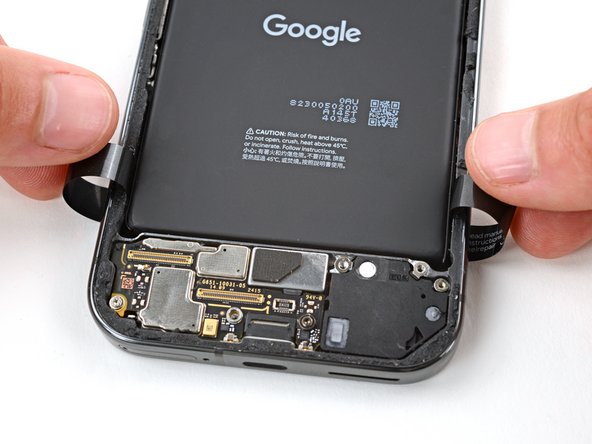
Use a spudger to pry up the top edge of the logic board until you can grip it with your fingers.
-
Grip the right side of the logic board and remove it, being careful not to snag the front facing camera and battery cables.
-
-
-
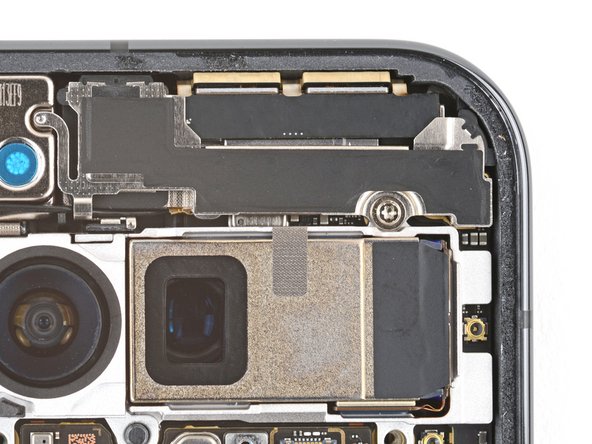
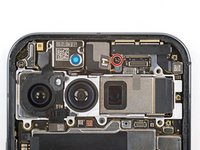
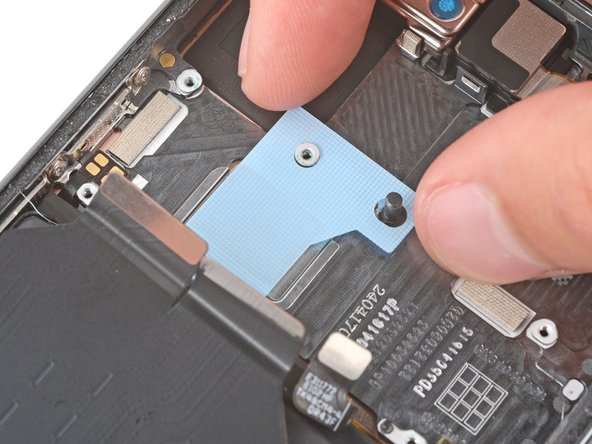
Check the condition of the logic board thermal pad—it will either be on the bottom of the logic board or on the frame.
-
If the pad is undamaged, skip the rest of this step.
-
If the pad is damaged, use the flat end of a spudger to scrape it up and remove it.
-
Use isopropyl alcohol (greater than 90%) and a microfiber cloth to remove all thermal pad residue from the frame and bottom of the logic board.
-
Apply a new thermal pad to its spot on the frame.
-
-
Tool used on this step:Finger Stalls$8.99
-
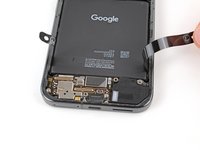
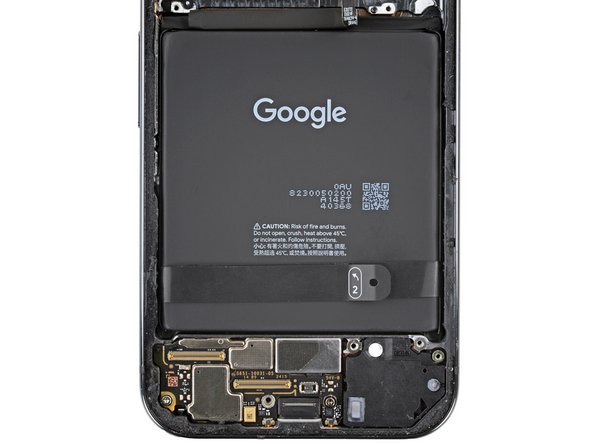
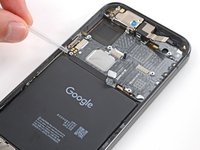
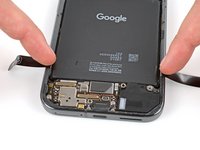
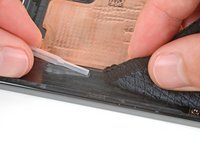
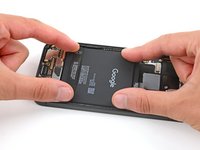
Use your fingers to peel up the plastic tabs near the bottom edge of the battery.
-
Fold the tabs under the phone or tape them out of the way so they don't warp when heating the battery in the next step.
-
Wear finger stalls to help get a solid grip on the battery pull tabs in the next few steps.
-
-
-
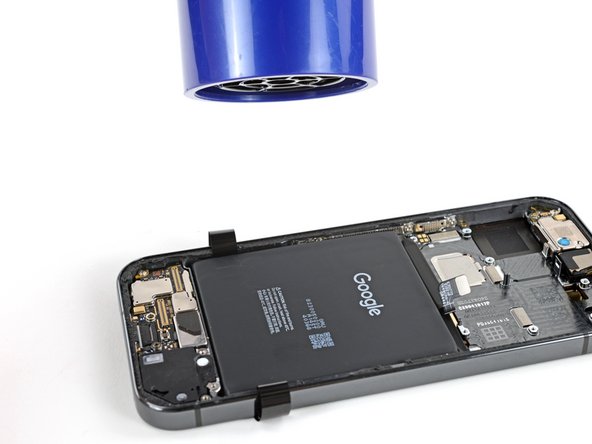
Strong strips of adhesive secure the battery to the frame. Heating the battery will soften the adhesive, making it easier to separate.
-
Use a hair dryer on High heat and Low speed settings to heat the battery for three minutes, while holding the hair dryer about three inches from the battery. Try to evenly spread the heat over the entire surface of the battery.
-
-
Tool used on this step:Heavy-Duty F-Clamp$13.99
-
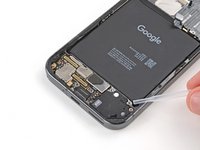
Move the pull tabs out from under your phone so they're accessible.
-
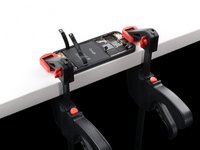
Use F‑Clamps or C‑Clamps to secure the phone to your work surface. At minimum, you'll need two clamps—one for the top edge and one for the bottom edge.
-
If you don't have any clamps, have a friend hold the phone firmly in place.
-
-
-
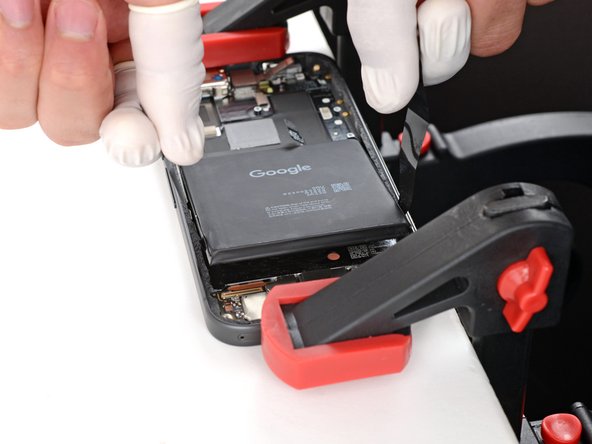
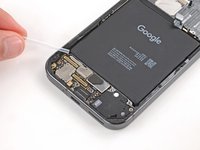
Pull straight up on both of the battery pull tabs and apply constant, steady pressure until the battery separates from the frame.
-
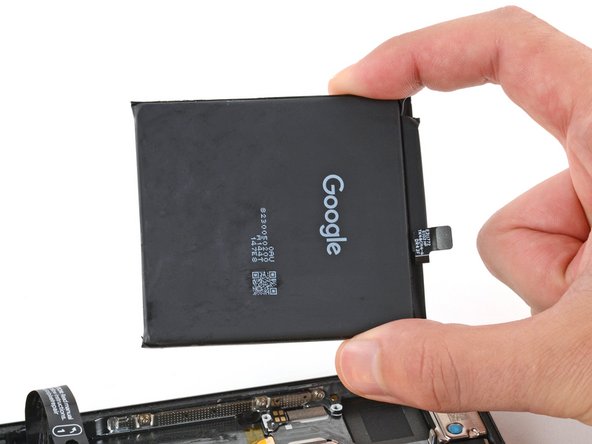
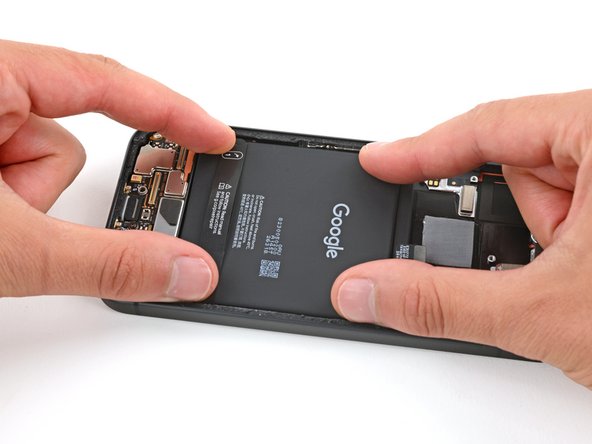
Remove the battery.
-
If you successfully removed the battery, congratulations! Skip down seven steps for reassembly information.
-
If the pull tab broke or accidentally slipped out from under the battery, don't worry! Go to the next step for an alternate battery removal method.
-
-
-
Apply two or three drops of isopropyl alcohol (greater than 90%) to the top corners of the battery.
-
-
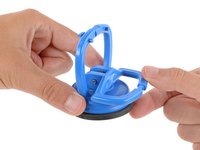
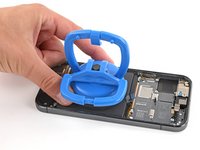
Tool used on this step:Heavy-Duty Suction Cups (Pair)$14.95
-
Pull the handle on the large suction cup down to open it.
-
Use your fingers to fold the plastic battery tabs fully out of the way of the battery.
-
Place the suction cup in the center of the battery.
-
-
-
With one hand, firmly secure the phone to your work surface.
-
With your free hand, pull the suction cup towards the bottom of your phone with strong, steady force to lift the top edge of the battery. Apply constant pressure with the suction cup to allow time for the adhesive to separate.
-
-
-
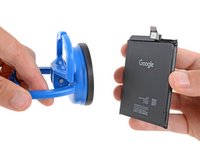
Remove the battery from its recess.
-
Take the suction cup off the battery.
-
If the battery pull tab stayed in the recess, remove it.
-
-
-
Use a spudger to scrape up and remove all the old battery adhesive from the frame.
-
Once all the old adhesive has been removed, use isopropyl alcohol (greater than 90%) and a microfiber cloth to clean up any adhesive residue.
-
Allow the frame to completely dry before installing a replacement battery.
-
-
Tool used on this step:Tesa 61395 Tape$2.99
-
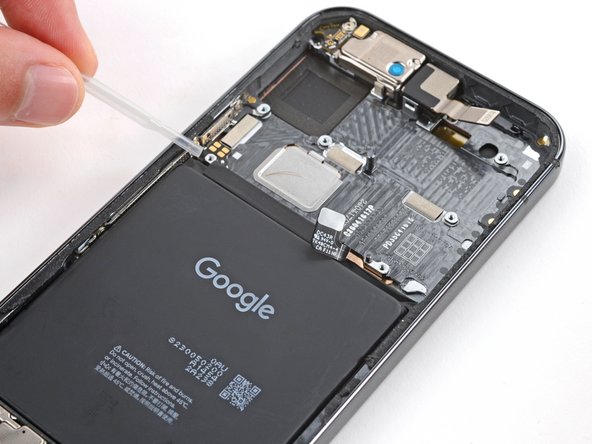
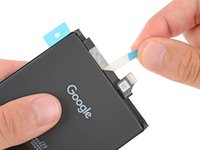
Remove any tape or liners from the battery cable.
-
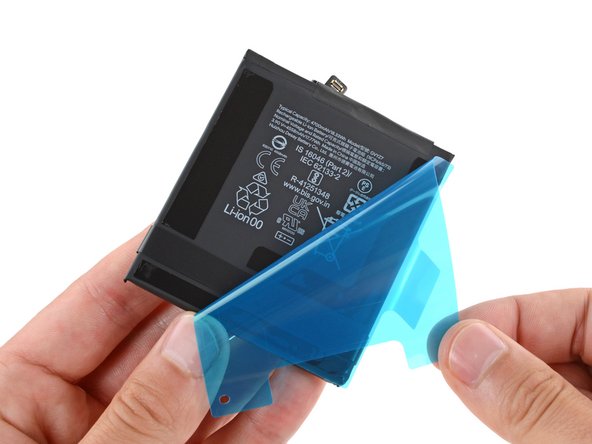
Remove the larger plastic liner from the bottom of the battery to expose the adhesive.
-
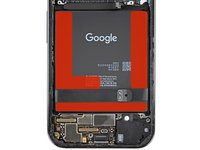
Firmly press the battery into its recess to secure it with the adhesive.
-


To reassemble your device, follow these instructions in reverse order starting with this step.
To run a diagnostics test with the built-in Pixel Diagnostic tool, click here.
For optimal performance, calibrate your newly installed battery after completing this guide.
Take your e-waste to an R2 or e-Stewards certified recycler.
Repair didn’t go as planned? Try some basic troubleshooting, or ask our Answers community for help.
Cancel: I did not complete this guide.
3 other people completed this guide.


2 Guide Comments
Hello team, does this genuinely not need any heat for softening the adhesive in the first steps?
Looks like nope, but it won't hurt to heat it to not damage anything, it is always easier to heat and loose adhesive!
XdekHckr -