Introduction
Does your pressure cooker show the dreaded C6 error while it makes alarming beeps? Follow this guide to diagnose what’s wrong and learn how to fix it!
The C6, C6L, and C6H errors means that one of the pressure sensors isn’t working. Most of the time, it’s due to a buildup on the sensor contacts. Cleaning the contacts will likely fix the problem.
This guide was written with an Instant Pot DUO80, but the general procedure can be applied to many electric pressure cookers because most use similar electronics and sensors.
What you need
-
-
Flip the pressure cooker upside down.
-
Use a T15 Torx driver to remove the screw securing the bottom plate.
-
Twist and remove the bottom plate.
-
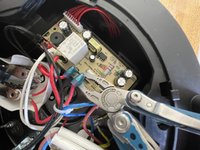
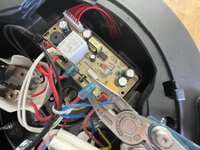
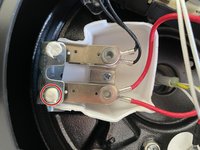
-
-
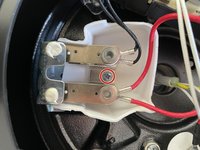
The T6L (low pressure) sensor and its connector. Some models may not have this.
-
The T6H (high pressure) sensor and its connectors.
-
The screws underneath the white resin are calibration screws.
-
-
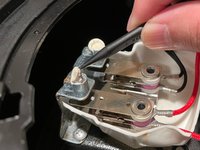
-
Use a spudger or your finger to firmly press the top of a sensor. You should hear a loud click, signifying that the metal strips in the sensor are flexing properly.
-
Repeat for the second sensor.
-
Sometimes, just flexing the sensors will fix the problem. Carefully re-assemble the pressure cooker and check if it works.
-
If the pressure cooker doesn't work, unplug the device, and follow the subsequent steps to further diagnose the problem.
-
-
-
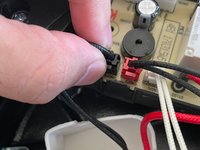
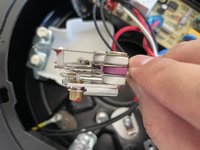
Use pliers or your fingers to lift and disconnect one of the sensor's spade connectors from the circuit board.
-
These connectors can be stubborn. Gently wiggle the connector as you pull to loosen it.
-
-
-
-
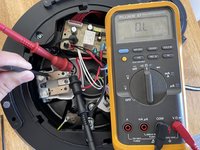
If the meter shows a high resistance or no continuity, it could mean that the sensor contacts are dirty. Double-check your meter contacts and make sure they're grasping onto the wires.
-
Use a spudger or your finger to firmly press on the top of the sensor until it clicks.
-
The meter should change to show no continuity (0.L, in my meter's case). If it doesn't, there is a potential electrical short—the contacts may be fused, or you may need to replace the sensor.
-
-
-
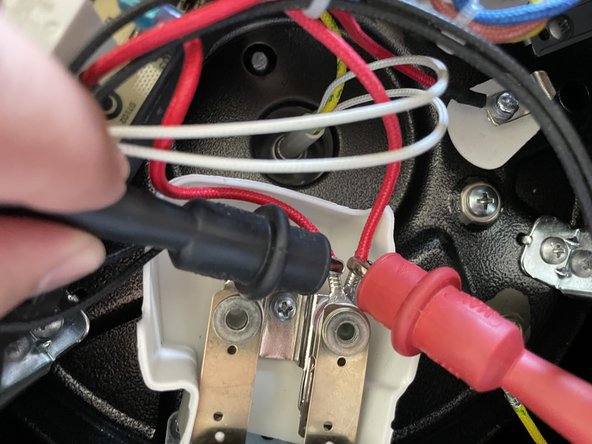
Disconnect the low pressure sensor by squeezing its circuit board connector to disengage the lock, then pull straight up.
-
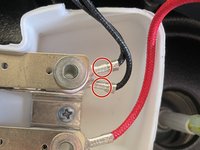
Attach a multimeter lead to both exposed ends of the sensor wires, making sure the leads don't touch each other.
-
Set the meter to resistance/continuity and test for continuity, when the sensor is resting, and when it's depressed.
-
-
-
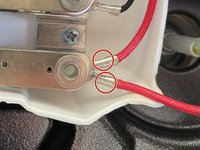
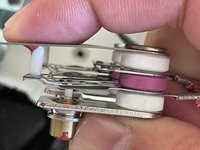
Use a Phillips screwdriver to remove the screw securing the sensors to the pressure cooker.
-
Lift the sensor assembly out of its recess.
-
-
-
Install your replacement pressure sensor and reassemble the pressure cooker.
-
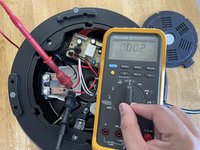
Add 3 cups of water to the pressure cooker and set it to cook on high pressure for five minutes.
-
Once the five minutes are up, vent using quick release.
-
-
-
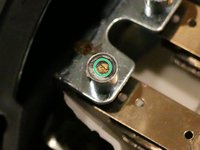
Unplug your pressure cooker and disassemble it until you can access the pressure sensors.
-
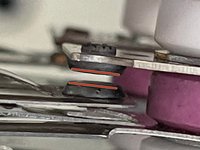
Use a spudger to pry away the white adhesive covering the high pressure sensor calibration screw.
-
This reveals the calibration screw's flat screwhead.
-
If your pressure cooker is over-pressurizing, use a screwdriver to turn the screw clockwise (tighten) by a quarter turn. This makes the sensor trigger and turn off at a lower heat.
-
If your pressure cooker is under-pressurizing, use a screwdriver to turn the screw counter-clockwise (loosen) by a quarter turn. This makes the sensor trigger and turn off at a higher heat.
-
Reassemble the pressure cooker and perform the pressure test in the previous step. Readjust the calibration screw as needed.
-
Once you've calibrated the pressure cooker, cover the calibration screw with some silicone or heat-tolerant adhesive. This prevents the calibration screw from turning.
-


To reassemble your device, follow these instructions in reverse order.
To reassemble your device, follow these instructions in reverse order.
Cancel: I did not complete this guide.
39 other people completed this guide.


63 Comments
Thanks for this helpful tutorial?
Great and informative presentation! The pictures show exactly what to do and make everything perfectly clear. In my case, I was able to clean the contacts and the pot is back to working order. It took more time to find my multi-meter than it did to fix the problem. As a bonus, I had to look up what a “spudger” is… Now I can stop calling it that “stick thingy.” ?
My IP-DUO80 from 2016 died with C6H. The high pressure switch didn’t click so I ordered and waiting delivery on a KS0105A dual switch. Apparently there’s another version (YCD3008) but I don’t know the difference. I saw your warning not to try calibrating the switch. Anyway, I did find a suggestion for the single high/low switch to turn the sensitivity screw clockwise/counter-clockwise as needed to adjust the high and low pressures.
Wow this post was just 11 hours ago. My
IP-DUO80 from 2016 died with C6H as well last night….wierd. Worked fine for years. Thanks for the part numbers. I have yet to pull the switch to see how bad the contacts are but the high pressure side definitely doesnt click when pushed. If cleaning doesn't help I will order a new switch.