Lenovo Yoga 3 11 SSD Replacement

Introduction
Go to step 1Use this guide to replace the SSD in your Lenovo Yoga 3 11.
What you need


-
-
Remove the eleven 6 mm T5 Torx screws securing the lower case.
-
Gently lift the lower case up and away from the device.
-
-
-
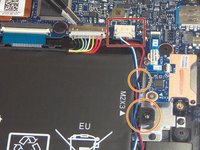
Use a pair of tweezers to gently disconnect the speaker cable.
-
Remove the wires from underneath the battery tabs using the tweezers.
-
-
Tool used on this step:Tweezers$4.99
-
Use a pair of tweezers to disconnect the motherboard-size of the trackpad ribbon cable. Gently lift up the black tab, and the cable should come free from the ZIF connector.
-
-
-
Use a pair of tweezers to disconnect the keyboard ribbon cable from the motherboard ZIF connector. Gently lift up the white tab, and the cable should come free.
-
-
-
Use a pair of tweezers to disconnect the motherboard-side of the SD board ribbon cable. Gently lift up the black tab, and then ribbon cable should come free from the ZIF connector.
-
-
-
Use the tweezers to unplug the USB port from the motherboard by gently lifting the white connector up from the black motherboard connector.
-
-
-
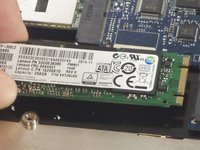
Remove the single 2 mm Phillips #00 screw securing the SSD.
-
Gently lift the SSD up and out of the device.
-