
MacBook Air 13" Mid 2012: loose or rattling trackpad repair
Introduction
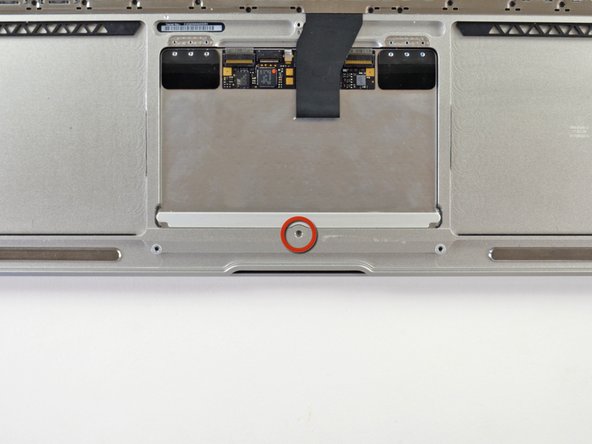
Go to step 1In some MacBook Air and presumably many other MacBooks the trackpad tend to become loose or rattle after a couple of years. It is a often read mistake, that this can be adjusted or "repaired" by the central adjustment screw of the trackpad (marked in step 10). This will only make it worse as the reason for the loose trackpad however can be found in the failure of two tiny buffers, that work as upper stop of the trackpad. Tiny as they are, few seem to know them and unsurprisingly they fail after countless workcycles. I did not find them as spare part but please leave a comment, in case they are avialable. I will then update this guide.
In rest position, they press the trackpad against the contact point of the mentioned adjustment screw and the click button. When you click, they decompress and when you release, they are recompressed by the bounce of the click button, which explains why their elastic force must be rather small.
Steps 1-11 base on older guides, which contain some wrong information: Do not follow step 10! The mentioned screw is only for adjustment of the clickpoint and must not be unscrewed. The trackpad already comes out after Step 8
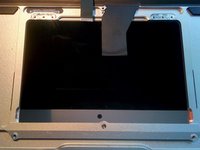
In this working position, we act directly above the display. So better place a thick cloth or any other protective material between screen an lower case before you begin.


-
Tool used on this step:P5 Pentalobe Screwdriver Retina MacBook Pro and Air$5.99
-
Use a P5 Pentalobe driver to remove ten screws securing the lower case, of the following lengths:
-
Two 9 mm screws
-
Eight 2.6 mm screws
-
-
-
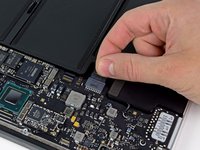
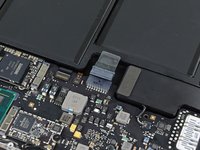
Grab the clear plastic pull tab attached to the battery connector and pull it toward the front edge of the Air to disconnect the battery from the logic board.
-
-
-
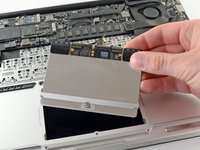
Lift the battery from its edge nearest the logic board and remove it from the upper case.
-
Charge it to 100%, and then keep charging it for at least 2 more hours. Then, unplug and use it normally to drain the battery. When you see the low battery warning, save your work, and keep your laptop on until it goes to sleep due to low battery. Wait at least 5 hours, then charge your laptop uninterrupted to 100%.
-
If you notice any unusual behavior or problems after installing your new battery, you may need to reset your MacBook's SMC.
-
-
-
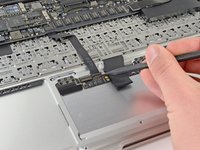
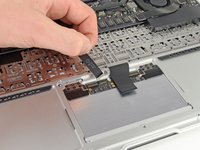
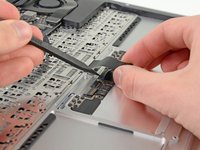
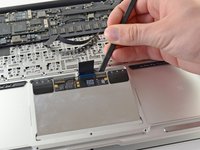
Use the tip of a spudger or your fingernail to flip up the retaining flap on the trackpad ribbon cable ZIF socket.
-
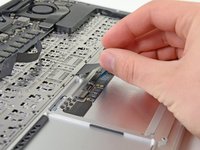
Pull the trackpad ribbon cable straight out of its socket toward the rear edge of the Air.
-
-
-
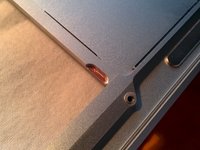
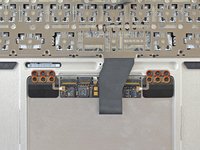
This is the seat of the buffer.
-
You will find the rest of the rotten buffer here, which made your trackpad rattle
-
Peel it off and clean with some alcohol or similar untill you see the raw aluminium surface
-
-
-
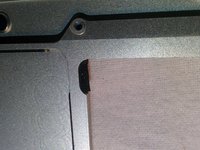
Cut two tiny (approx. 1,5 x 4 mm) pieces of double sided adhesive tape and place them on the seat
-
the red colour comes form the protective film of Tesa 4965, which works perfectly for this job. But principally any double sided tape, which is not too thick should do
-
On the second photo you see the empty seat on the left and the prepared one on the right
-
-
-
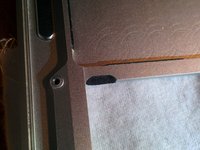
Now cut a piece of foam material of the same size. My foam material is black, and therefore a bit hard to see
-
In this case an EPDM foam was used, which can be compressed with little force but has a high longevity
-
The material must be below one milimeter thick! depending on your source material you will have to cut all tree dimensions
-
This took me many tries…
-
-
-
Peel off the protective film of the double sided tape and position the foam parts on both sides.
-
It should look more or less like on the photos
-
-
-
Reinstall trackpad by following step 8 in reverse order but only tighten the 6 screws at the trackpad (orange) firmly and leave the 6 screws of the case (red) slightly loose
-
Open the MacBook to nearly 90° so that it stands stable on its display case.
-
Check the feel of the click. Does it go back gently into rest position? Has it enough stroke?
-
If not, you might have chosen to rigid or to thick material (or both)
-
You may also try to readjust the central screw which is marked in step 10 and which you hopefully did not unscrew!
-
-
-
Finally center the trackpad in the case. This can easily be done by positioning a lamp behind the vertically standing lower case.
-
Move the trackpad in order to have an equal gap all around it. Then tighten the remaining 6 screws firmly to fix your adjustment.
-
Reassemble the rest going back from Step 8 and you're done!
-


To reassemble your device, follow these instructions in reverse order.
To reassemble your device, follow these instructions in reverse order.
Cancel: I did not complete this guide.
4 other people completed this guide.
5 Comments
Hello, good tutorial. Today on my Macbook Air disarm the trackpad, since it was loose and it sounded when using it. The only solution and that was good for me, was to tighten the central screw, to the point that it remained firm and allowed the clicks.
Another thing, the brackets I found on ebay, the pair at $ 5.
Very good guide. I did this yesterday on my Macbook Air Early 2014 and it solved the problem but as @ifixitkit mentioned in Step 8, “Removing the bracket is completely unnecessary”.
Thank you for the guide. I do advise against removing the 6 Philips screws attaching the trackpad to its hinges as described in Step 8. They simply don’t have to be removed, unless you’re replacing the trackpad.
My 2013 11” Air’s trackpad had started rattling after a battery swap and the noise drove me positively nuts. The trackpad does feel as good as new now. I used a ~1mm thick double sided foam tape instead of EPDM, hoping that it’s robust enough to last.
Nice guide, my 5 year old machine had a loose trackpad that was making it difficult to register clicks and drags. All I had to do was step 10, not even remove the battery and the trackpad is as flush as new now 😊
Thank you so much! The trackpad of my MacBook Air 11'' early 2015 was ratteling because I changed the battery. I really couldn´t find out the problem. Than I found this guide and as mentioned I just had to adjust the screw in step 10 a little bit and now it is working perfectly again.