Introduction
This is a prerequisite-only guide! This guide is part of another procedure and isn't meant to be used alone.
What you need
-
-
Heat an iOpener and apply it to the back cover's right edge for two minutes.
-
-
-
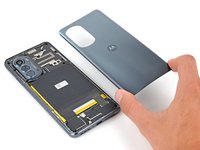
Apply a suction cup to the back of the phone, as close to the middle of the right edge as possible.
-
Pull up on the suction cup with a strong, steady force to create a gap between the back cover and the frame.
-
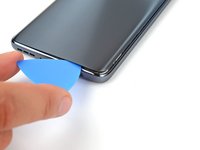
Insert an opening pick into the gap.
-
-
-
Slide the pick along the right edge to slice the adhesive.
-
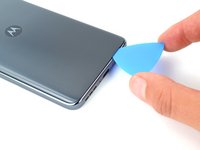
Leave the pick in the bottom right edge to prevent the adhesive from resealing.
-
-
-
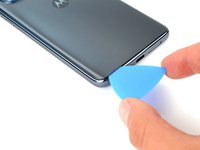
Apply a heated iOpener to the back cover's bottom edge for two minutes.
-
-
-
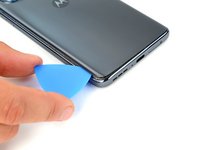
Rotate the pick around the bottom right corner to slice the adhesive.
-
-
-
-
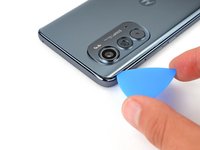
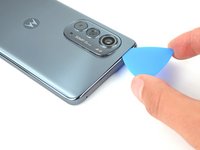
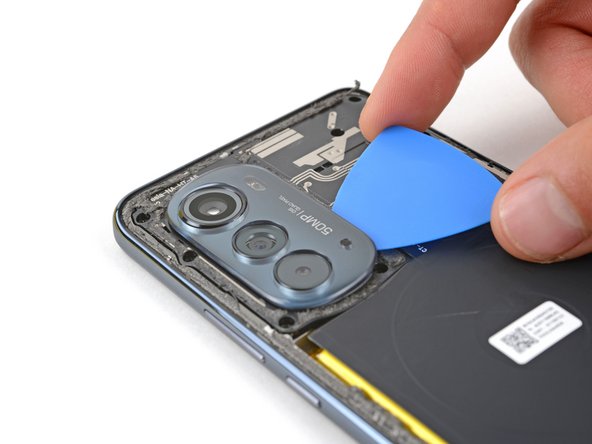
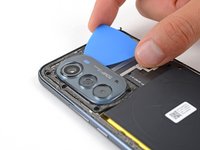
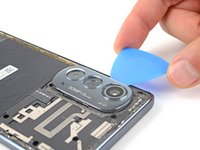
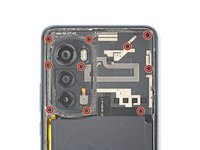
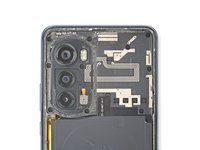
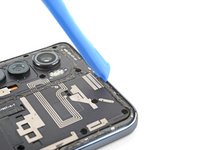
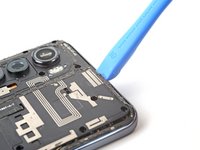
Insert an opening pick between the right edge of the camera bezel and the motherboard cover.
-
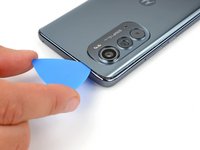
Slide the pick back and forth along the edge to slice the adhesive.
-
-
-
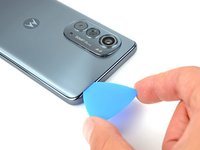
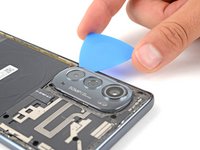
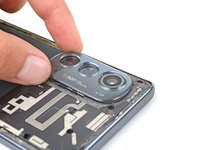
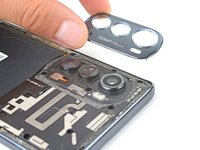
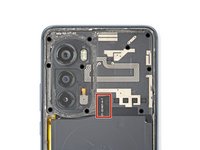
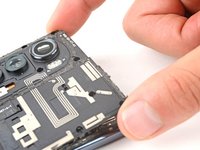
Lift the camera bezel from the phone and remove it.
-
This is a good point to test your phone's functionality before sealing it up. Use this guide to run a hardware test. Be sure to power your phone back down completely before you continue working.
-
If you are replacing the fingerprint sensor or screen assembly, use this guide to calibrate the fingerprint sensor.
-
Follow this guide to replace the back cover and camera bezel adhesive.
-
-
-
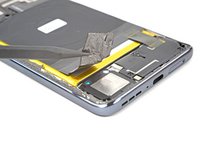
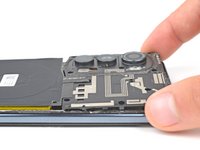
Insert the pointed end of a spudger underneath the tape that connects the wireless charging coil to the speaker on the bottom left of the phone.
-
Slowly lift the spudger up until the tape detaches from the speaker.
-
-
-
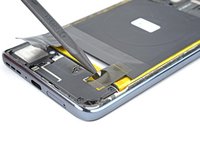
Insert a spudger underneath the tape that connects the wireless charging coil to the daughterboard cover on the bottom right of the phone.
-
Slowly lift the spudger up until the tape detaches.
-
-
-
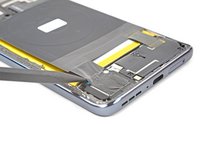
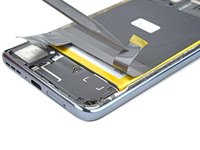
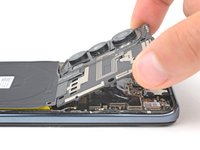
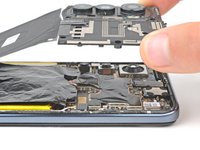
Slowly pull the motherboard cover up and away from the phone and remove it.
-


To reassemble your device, follow these instructions in reverse order.
To reassemble your device, follow these instructions in reverse order.

