Introduction
This guide will walk you through the process of opening and replacing the camera
What you need
-
-
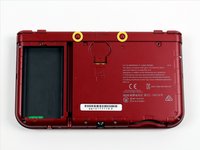
Place the 3DS upside down. Remove the game card, headphones, charging cable, stylus, or anything else that may be connected to the device.
-
-
-
Using a JIS #00 screwdriver, remove the six 6mm screws around the edges of the secondary cover.
-
-
-
-
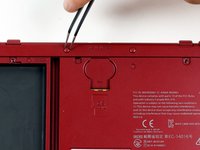
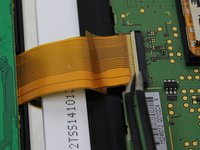
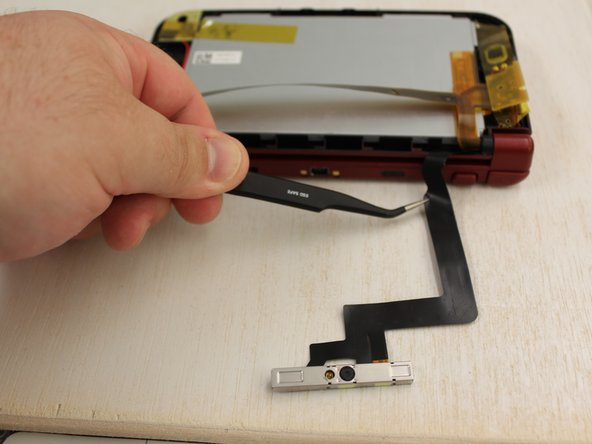
Use tweezers to flip up the small, hinged locking flap in order to unlock the ZIF connector securing the Circle Pad ribbon.
-
Slide the ribbon out of the ZIF connector.
-
-
-
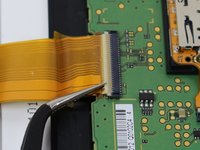
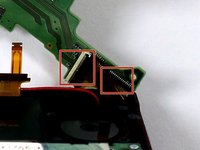
Using tweezers, gently pull the four marked ribbons out of the ZIF connectors along the sides of the motherboard.
-
Three of the ribbon connectors have plastic clamping flaps that cover the ribbon to prevent slippage. Use the tweezers to flip them up before ribbon removal.
-
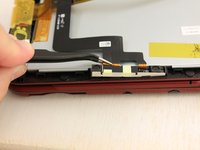
This one ribbon connector may also have a plastic clamping flap, but it's not like the others, rather it's similar to the one used for the Circle Pad. Gently flip up the flap on the side opposite the ribbon cable to remove the cable.
-
-
-
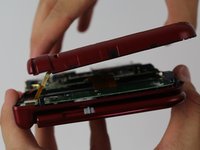
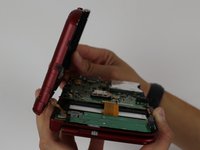
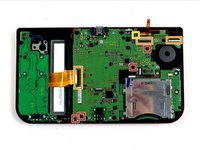
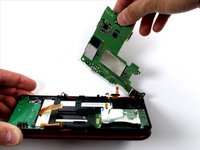
Carefully pivot the motherboard 90 degrees toward the hinges to reveal two more ZIF connectors on the underside of the motherboard.
-
Both have latches that must be flipped up. The left, longer latch is black; the right, shorter one is white. Flip up the flaps, slide the ribbons out and remove the motherboard.
-
-
-
Using a 1.5 flat head, remove the four red rubber stickers that are on the inside of the casing.
-
Underneath the rubber is a silver sticky
-
Using the PH00 screw driver, remove the screws.
-
-
-
The camera should be loose, just lift carefully.
-
the cable that is attached to it, should be easy to remove from the bottom half of the DS.
-


To reassemble your device, follow these instructions in reverse order.
Cancel: I did not complete this guide.
2 other people completed this guide.

Team

iFixit, Team 1-1, Weber Winter 2016 Member of iFixit, Team 1-1, Weber Winter 2016
FIX-WEBER-W16S1G1
4 Members
38 Guides authored
6 Guide Comments
This doesn't actually show how to get the new camera in, I managed to pull the cable of the old one out but I have no idea how to get the new one through the hinge cover wrapping surround the wires
In some youtube video I saw that guy rolled new camera ribbon cable and got it through the hinge cover.
A whole bunch of steps missing the end. First you have to release the hinge: Remove the circuit board that has the arrow keys (4 screws), remove two plastic pieces immediately above (one black square, when removed a transparent thin piece is visible.
Open hinge to near 180. Using probe or bent tweezers or stiff, thin item, push the hinge pin towards the middle through the narrow opening exposed when the plastic pieces were removed. When it touches the display it's far enough, you may have to slightly flex the hinge to release the pin.
You can now release the other side, with the flex cables going through it and the antenna cable. Feed the 3 flex cables into the slot in the plastic as you release the hinge; once it's clear you can pull them through.
Curl the camera cable (it was on top, and attached on the upper side of the corner of the mainboard) and pull it through the rung and hollow ring.
continues...
"missing at the end" :-)
jesup -
Now reverse with the new cable - curl it gently to get it into the hinge and through the ring, help pull through with tweezers. Now you can start reversing. Note that the hinge pin needs the screen to be open near 180 to slide back into place. Also be careful when reattaching ribbon cables - the display cable (bottom cable of the 3 in the hinge, the longest one) is easy to put in upside down. Take pictures when disassembling. (contacts for this one go down)