Introduction
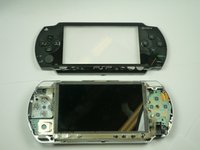
The PSP's buttons may become jammed or may not function properly. This guide will show how to access the buttons for repair, cleaning, or replacement.
What you need
-
-
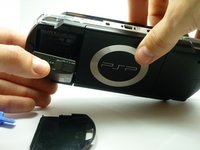
Locate the battery casing button on the rear-left side of the PSP.
-
Press down the button and remove the battery cover.
You are dumbbb... BRO YOUR DUMB BC U DIDNT HAVE TO USE A TOOL TO OPEN THE DOOR. USE YOUR FINGER""
The battery door can be damaged dont use a tool
That also happend to me it got destroyed by screwdriver
-
-
-
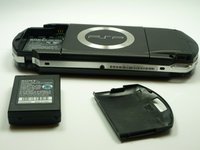
Using your finger, remove the battery upwards from the system as shown.
The use of the opening tool is completely unnecessary. There is a finger actuated opening latch button that says “PUSH” on it. Simply press down with your thumb then slide your thumb down and away, dragining the battery door with it. It will then come off. Assuming the system still has its original plastics, they may have become brittle enough that the opening tool could damage the release button or the plastic cover.
-
-
-
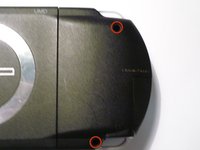
Remove the four screws shown with a Phillips #00 screwdriver.
you need to peel back the warranty sticker in order to access both the lower left and lower left screws
This is a bit misleading, you should only remove the two black screws in the battery compartment. The silver ones can stay.
iFixit screwdriver bits aren't thin enough to reach the two screws on the right near the memory stick slot.
Can't edit previous comment so here's a new one:
Standard or older iFixit screwdriver bits aren't thin enough to reach the two screws on the right near the memory stick slot. You'll need precision bits that have longer tips to reach these deep screws.
-
-
-
-
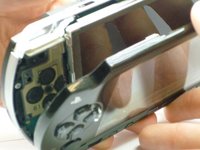
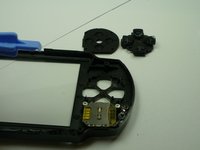
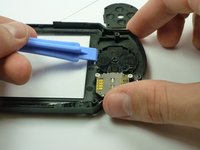
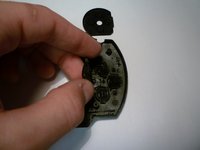
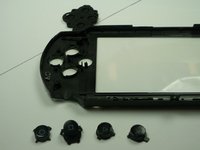
If the Arrow Buttons are not functioning properly, flip over the outer casing and locate the inside of the buttons, as shown
-
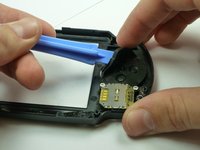
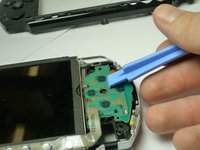
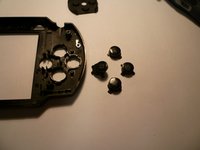
Carefully remove the black rubber backing off of the buttons.
-
Clean the inside of the rubber and the outside of the buttons with a cloth.
-
-
-
Once buttons are correctly replaced, the back rubbers are fit back onto the buttons, refer back to Replacing the Housing to reattach the casing.
-


To reassemble your device, follow these instructions in reverse order.
To reassemble your device, follow these instructions in reverse order.
Cancel: I did not complete this guide.
33 other people completed this guide.

Team

Cal Poly, Team 5-6, Forte Winter 2010 Member of Cal Poly, Team 5-6, Forte Winter 2010
CPSU-FORTE-W10S5G6
5 Members
33 Guides authored
12 Comments
It's a helpful guide,thx
Great guide. I highly Recomend this to anyone that needs to replace their PSP buttons
Otimo guia recomendo.
use magnetised screwdriver i had a normal one and it was a pain in the ass to put those tiny little bastards back
Thank you this was a great guide
I have a similar problem with my psp 3000. The X button does not work when it is pressed. I removed the casing, checked if there was dirt on the rubber padding and on the motherboard where the buttons sit and there is no dirt. What should I do now. I realy love my psp, but without the X button working I can not use it. Is this problem fixable?
Christopher, if that’s the case then you probably need to replace the conductive rubber padding, as that’s the part that really gets all the wear. I don’t know where you would find a replacement rubber padding, but you might try eBay or Amazon.
Hey Daniel, thanks for your responce. Im still not sure exactly what the probelm is myself so thanks for the insight. I have ordered a new flex cable to see if that’s the soultion. Could this be the problem, a broken flex cables?
I recently bought a psp 3000 and when I started to use it, in the software of the psp the “X” button is set as the back button and the “O” button is set to be the enter button. I reset the factory setting, it doesn’t go to “X” being enter and “O” being back. Anyone know how to fix this problem? Could the psp be fake?
It must be the Japanese Model. I own two Japanese psps and O is always the enter button. X is the back button and triangle is usually the menu screen. Hope that helps!
My issues is the joy stick and it doesn't show how to fix joystick
Como solucionar quando o aparelho começa a entrar sozinho para sair do jogo ?