Introduction
These instructions may also help with other Melitta models and with coffee makers from Nivona, Siemens, and Miele—they have a very similar design.
These instructions will show you how to replace the drainage valve.
Please note: Some pictures are taken from the almost identical Siemens Surpreso Compact. Little visible differences are of no importance.
What you need
-
-
Remove the water tank and drainage tray.
-
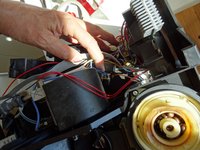
Remove the side cover and remove the brewing unit.
-
Remove all coffee beans.
-
-
-
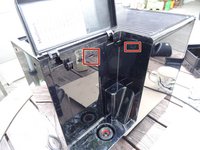
Press carefully into the slits on the sides using a minus screwdriver or a flat metal spatula, to release the clasps on the upper surface. These may be well tight and you have to use some force.
-
You should have created a separation between the upper surface and side panels. Now lever the upper covering away using a plastic tool. This may be quite stuck and you may apply some force.
-
-
-
-
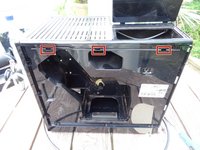
Place a plastic tool in the crack between front panel and left side panel and widen it. Then push the side panel to the back. The side panel will be quite stuck and you may apply some force to do this.
-
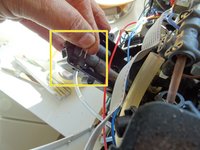
Remove the hose from the water tank to the pump.
-
Remove the side panel.
Hi, I have a Melitta Caffeo Solo E950 and had a problem with the switch (it said that the drainage tray was always in while I removed it).
I was able to access the switch right after the step 4 behind the side panel.
Paul
Do you mean this one: Melitta Caffeo Solo microswitch on the drip tray replacement?
VauWeh -
-
-
-
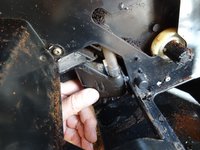
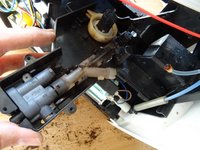
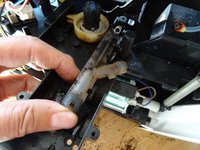
The drainage valve is exposed.
-
Remove the spring on the lower end of the valve.
-
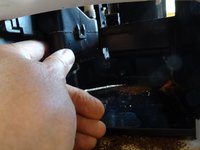
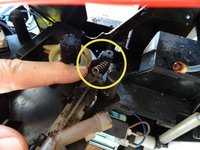
Lift the upper gray part of the valve. Push the lower part of the valve a little bit downwards und lift it out.
-


Apply the steps in reverse order to reassemble the machine.
Apply the steps in reverse order to reassemble the machine.
Cancel: I did not complete this guide.
One other person completed this guide.
Special thanks to these translators:
100%


These translators are helping us fix the world! Want to contribute?
Start translating ›
Team

Repair is War on Entropy Member of Repair is War on Entropy
Community
29 Members
1,752 Guides authored
3 Comments
Very good instructions it took me about an hour. be careful with the o rings you need toe remove the old one from the ols drain valve. And also take care with the back large white plastic spacer behind the gear drive, it drops off easily and needs to be in the same position (there are 3 possible positions!!!!) also on mine there was just a tube for the expansion.
Hi VauWeh, thank you very much for your guide!
I think I was working on this Drainageventil, when suddenly a ball bearing (or Float-Ball?) came loose. Any idea where the ball should be?
Look at this guide, step 10. There is a part marked orange, a spring loaded piston. Older valves don't have this, but only a single (lose) ball, no spring. I think this is your ball. Just put it back, that's all!
VauWeh -
bei meiner Maschine muss ich die Schale 3-4 mal rausnehmen / einsetzten damit sich das Signal von „dauerhaft an“ auf „blinkend“ einstellt, deutet das daraufhin das der mikroschalter getauscht werden sollte. Übrigens, danke für das tolle Tutorial ..lg Tom
Hans-A Shole - Reply
Problem ist behoben, Schalter getauscht, Position des Schalters ist bei der Caffeo Solo 950 sehr gut erreichbar. Alter Schalter konnte auch wieder gangfähig gemacht werden und dient nun als Ersatz.
Hans-A Shole - Reply