
You're viewing a previously published version of this guide.  View latest version

Older Newer
Toshiba Satellite C55-A5100 Optical Drive Replacement

Toshiba Satellite C55-A5100 Optical Drive Replacement

Walker Tortorigi

Walker Tortorigi and 5 other contributors

Last updated on July 8, 2023

10 - 15 minutes
Easy

Introduction

Go to step 1

Replacing the optical drive in a Toshiba Satellite laptop should not be seen as difficult, but does involve opening one of the panels on the underside of the laptop.

What you need

Tools

  1. Toshiba Satellite C55-A5100 Optical Drive Replacement, Battery: step 1, image 1 of 1
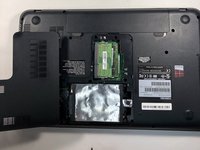
    • Press down with your fingers while also applying a sliding motion on the latch buttons near the battery on the underside of your laptop.

  2. Toshiba Satellite C55-A5100 Optical Drive Replacement: step 2, image 1 of 1
    • Lift the battery upward with your fingers out of the battery compartment.

  3. Toshiba Satellite C55-A5100 Optical Drive Replacement, Optical Drive: step 3, image 1 of 3 Toshiba Satellite C55-A5100 Optical Drive Replacement, Optical Drive: step 3, image 2 of 3 Toshiba Satellite C55-A5100 Optical Drive Replacement, Optical Drive: step 3, image 3 of 3
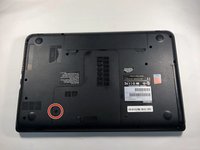
    • Place laptop with the bottom of it facing up.

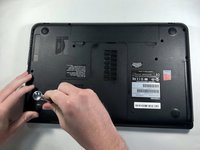
    • Remove the single 6mm Phillips #1 screw keeping the laptop panels in place.

  4. Toshiba Satellite C55-A5100 Optical Drive Replacement: step 4, image 1 of 1
    • Remove the 4mm Phillips #1 screw on the side of the now exposed area.

  5. Toshiba Satellite C55-A5100 Optical Drive Replacement: step 5, image 1 of 1
    • Remove the disc drive from the device.

View Statistics:

Past 24 Hours: 0

Past 7 Days: 0

Past 30 Days: 9

All Time: 377