
Opening Procedure (1st and 2nd Gen)

Notice: You are editing a prerequisite guide. Any changes you make will affect all 7 guides that include this step.

English
Dutch

Translating step 6

Step 6
Opening Procedure (1st and 2nd Gen), Insert an opening pick: step 0, image 1 of 3 Opening Procedure (1st and 2nd Gen), Insert an opening pick: step 0, image 2 of 3 Opening Procedure (1st and 2nd Gen), Insert an opening pick: step 0, image 3 of 3
Insert an opening pick
  • If your screen is badly cracked, covering it with a layer of clear packing tape may allow the suction cup to adhere. Alternatively, very strong tape may be used instead of the suction cup. If all else fails, you can superglue the suction cup to the broken screen.

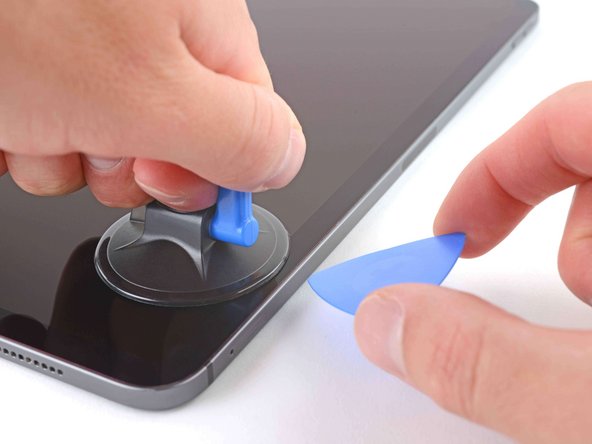
  • Apply a suction handle to the right edge of the screen, about 5 cm from the bottom edge.

  • Pull up on the suction handle with firm, constant pressure to create a gap large enough to insert an opening pick.

  • Only create a gap small enough to insert an opening pick. Overbending the screen will damage it.

  • Insert the tip of an opening pick into the gap.

  • Don't insert the opening pick more than 5 mm or you'll damage the LCD.

Insert translation here

Insert translation here

Insert translation here

Insert translation here

Insert translation here

Insert translation here

Your contributions are licensed under the open source Creative Commons license.