
Google Pixel 9 Pro XL Rear Cameras Replacement

English
Italian

Translating step 8

Step 8
Google Pixel 9 Pro XL Rear Cameras Replacement: step 0, image 1 of 3 Google Pixel 9 Pro XL Rear Cameras Replacement: step 0, image 2 of 3 Google Pixel 9 Pro XL Rear Cameras Replacement: step 0, image 3 of 3
  • Be very careful not to touch the camera lenses during this step. If you accidentally do, wipe them with a clean microfiber or lint‑free cloth.

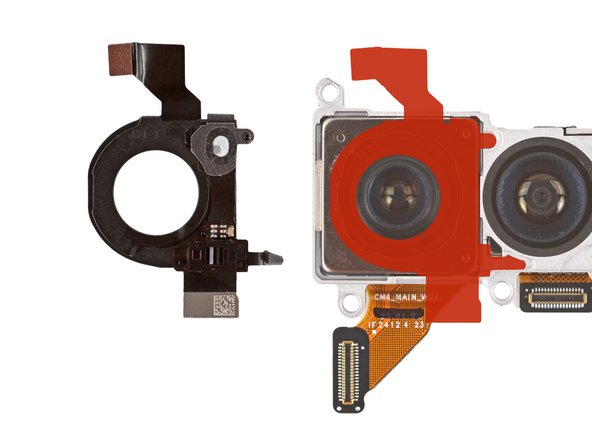
  • If your replacement rear cameras have protective caps or liners, remove them.

  • Before applying the autofocus sensor to your replacement rear cameras, hold the sensor over your replacement cameras and find its proper orientation.

  • There are cutouts on the left edge of the middle camera that line up with the short protrusions on the right edge of the sensor.

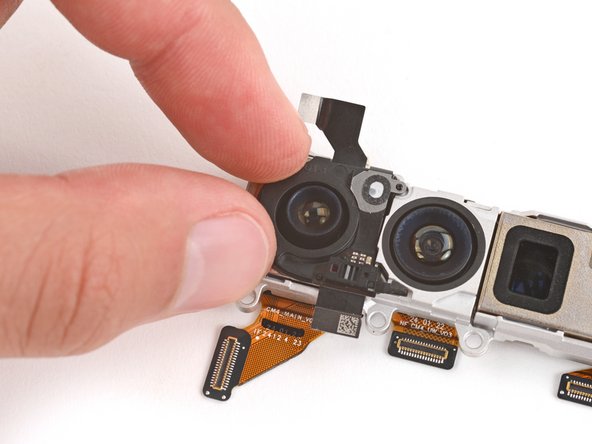
  • Carefully lay the sensor over the rear camera and use your fingers to press it into place, securing it with the adhesive.

Insert translation here

Insert translation here

Insert translation here

Insert translation here

Insert translation here

Your contributions are licensed under the open source Creative Commons license.