Introduction
A bent SL/SR button board cable will cause the SYNC button, the LED lights and the SL/SR buttons to be unresponsive. This will make the Nintendo Switch Joy-Con unable to connect to a game console by itself without a second Joy-Con.
Before using this guide, determine that the buttons are unresponsive by going to the system settings of the game console and testing the input devices under the 'Controllers and Sensors' section.
What you need
-
-
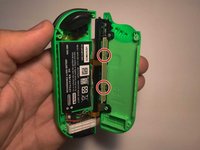
Remove the four 6 mm screws visible on the back of the Joy-Con using the Tri-point Y00 screwdriver.
-
-
-
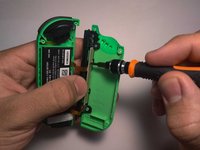
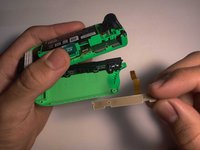
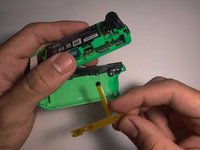
Open the Joy-Con by inserting the opening pick tool into the bottom corner and sliding it upwards.
My joycon would not open as cleanly as what is pictured here. The white box at the bottom of the controller in the last picture stuck to the top compartment and became detached from the part with the battery. It's possible it could have detached the other way, but I didn't risk it. I was still able to do the repair, but it gave a much tighter window as I needed to be very careful to not be to forceful on the battery wires.
-
-
-
-
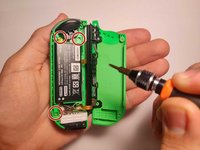
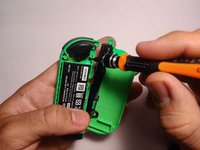
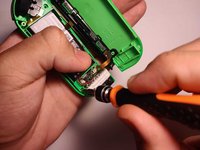
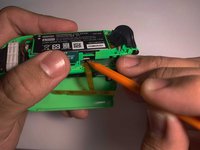
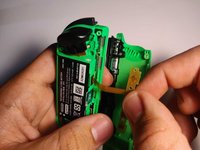
Remove the three 3 mm screw on the battery compartment using the Phillips #00 screwdriver.
En la imagen se realiza sobre el Joy con derecho, si es el izquierdo, solo será un tornillo en la parte baja, se despega la batería y se sacan los dos tornillos de la chapa
I must have had a different model because there weren't any screw near the trigger on top of the battery for me. Those screws were located under the battery, which you can lift up (it is a little sticky). To do this on mine, I had to detach the rail from the lid in order to give myself enough clearance to lift the battery out.
Originally, I tried to do the next steps without lifting the battery compartment, but it was too difficult to mess with the locking mechanism on the ribbon. -
-
-
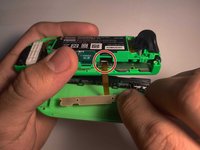
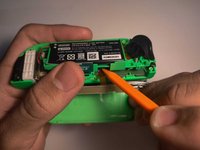
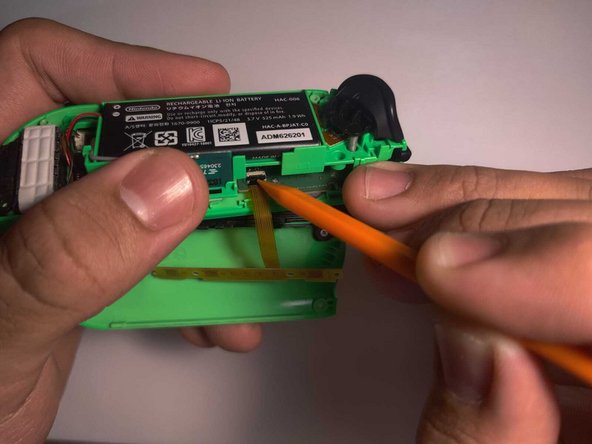
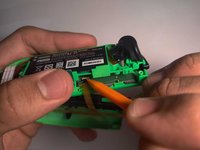
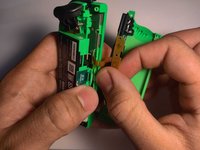
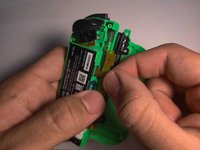
Insert the new replacement button board cable into the tab.
-
Use the spudger to re-lock the tab to hold the new part in its place.
I can’t this to lock in to place any ideas on who to get it to work
-


To reassemble your device, follow these instructions in reverse order, starting from Step 4.
To reassemble your device, follow these instructions in reverse order, starting from Step 4.
Cancel: I did not complete this guide.
69 other people completed this guide.

Team

University of Puerto Rico Mayagüez, Team 2-4, Cools Stephens Spring 2022 Member of University of Puerto Rico Mayagüez, Team 2-4, Cools Stephens Spring 2022
UPRM-COOLS STEPHENS-S22S2G4
1 Member
7 Guides authored
18 Comments
Nice guide. To loosen the battery compartment on my controller I had to remove te battery first. I couldn't see te top 2 screws in step 4. The battery was sticked to the bracket with some tape but removes easily. Underneath the battery were two screws.
Edit: maybe its different because I had to change the button board on the left JoyCon.
Yes! This Guide above shows the right Joycon. As for the left one there are two screws below the battery as you said!
Very helpful step-by-step guide. Thank you.
Had to change the Button Board on the left Joy-con. The screws were also located under the battery in my case. Attention: there 4 screws under the battery, two of which diagonal to each other that hold the battery compartment in place. No need to unscrew all 4.
Will this replacement also fix the LED lights that are now not working on my controllers? And if not, will this be a problem for playing with one Joy-con?
Depends on why your LED´s are not working. For my it was because the SR SL input was not registered, which will be a problem (only) for single joycon use. If its only the LED which is not working, then you should be fine.
Thanks for spreading this knowledge to us.
Thank you! My right button on the side turned unresponsive. I replaced the button board with this guide and fixed it!
Great guide - thank you. i need new eyes though... can barely see the screw heads!
Mega, nach dieser Anleitung funktioniert der Joy wieder einwandfrei 💪🏼👍🏼.
Excellent guide, thanks!
I also had a left joycon, so thanks to everyone who commented about the difference with the battery screws.
After I closed everything, i could feel the battery moving inside, I think it'd be better to stick it in place woth some tape.
Also, the hardest part for me was stel 6, inserting the new cable into the tab. I couldn't make it stay inplace. Then I broke the black tab lock. But finally I managed to put the cable into the tab, fold it like described and close the battery compartment, and the cable stayed in place.
The joycon works! I hope that shaking the joycon won't free the cable as nothing is locking it in place except for the cable tension due to it being folded.
Just used this tutorial today to fix my left joycon, thanks for the tips! One thing I’d also recommend is reinforcing the part so the SL and SR buttons are more clicky. To do this, I took the old, faulty part and ripped off the ribbon cable, then used a knife to remove the electronic parts from it so it was just a flat board of the exact same shape. I then screwed both in together one on top of the other, so that the part didn’t flex as much when the buttons were pressed. It’s now more clicky than the original board, which is nice! The piece flexes less too so less prone to breaking.
Thank you for the guide Javier! Thought my luck had run out when my OG joycons stopped working individually, but this guide and parts saved them! 7 years strong and going.
Definitely recommend folding the cable under the battery. It can feel tight because the new boards' cables come super straight, but just fold it over as much as you can and press the battery down on top. No matter how hard you press the battery the space stays quite big for them so just keep it in place while you screw it back in
The guide is incomplete. It should include a 'how-to' section for the left Joy-Con as well, since the steps are different enough to cause confusion.